Renovating a bathroom can significantly improve the functionality, comfort, and value of your home. However, before you dive into the renovation process, it’s crucial to plan effectively to ensure the project runs smoothly and stays within budget.
This step-by-step guide will walk you through everything you need to know, from conceptualising your ideas to executing them flawlessly.
Step 1: Set Your Budget
The first thing you need to do when planning your bathroom renovation is to establish a clear budget. Knowing how much you can afford will help guide the scope of your project and ensure you make informed decisions.
How To Determine Your Bathroom Renovation Budget
- Assess Your Finances
Take a good look at your current financial situation. Do you have savings set aside for the renovation, or will you need to finance the project through a loan? - Research Average Costs
Understand the average costs for bathroom renovations in your area. You can expect to pay more in major cities than in regional areas. Typically, renovations can range from a few thousand dollars for a basic makeover to tens of thousands for a luxury remodel. - Allocate Funds for Key Areas
Prioritise spending on essential aspects, such as plumbing, tiling, and fixtures. If you’re working with a limited budget, consider cutting back on non-essentials, like custom cabinetry or high-end finishes. - Include a Contingency Fund
It’s always a good idea to have 10-20% of your budget set aside for unexpected expenses. Renovations often uncover hidden issues, such as plumbing or electrical problems, that can increase costs.
Step 2: Define The Scope Of Your Renovation
Now that you’ve set your budget, it’s time to decide how extensive your renovation will be. Will you be doing a full remodel, or simply updating certain aspects of your bathroom?
Full Renovation Vs. Cosmetic Makeover
- Full Renovation:
A complete overhaul of your bathroom involves structural changes, such as relocating plumbing fixtures or expanding the space. This will require professional help and can be time-consuming. - Cosmetic Makeover:
A cosmetic update typically includes replacing tiles, painting walls, installing new fixtures, or changing the vanity. This is a less expensive option and can be done in a shorter amount of time.
Considerations When Defining The Scope
- Structural Changes: Are you changing the layout or moving plumbing fixtures?
- Style and Design: Are you after a modern, traditional, or minimalist look?
- Space Efficiency: Do you need more storage or a more open layout?
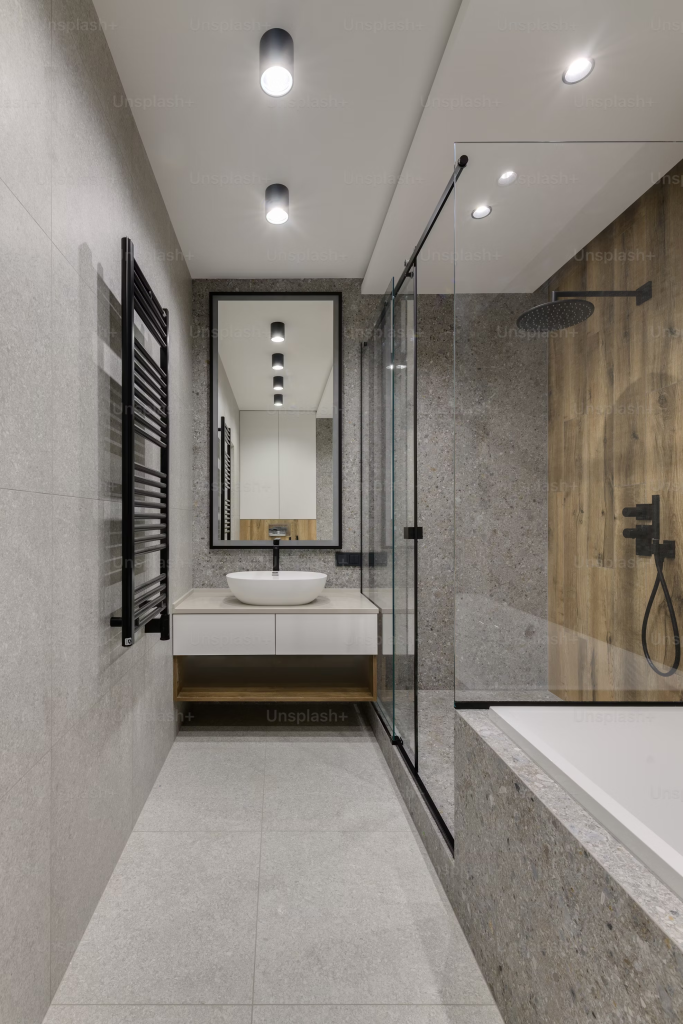
Step 3: Plan Your Design
The next step is to plan the design of your bathroom. This includes choosing materials, colours, and finishes, as well as deciding on the layout and style of the space.
Layout And Design Ideas
- Choose Your Bathroom Style
Consider the aesthetic you want to achieve. Popular options include contemporary, rustic, industrial, and coastal styles. Choose a style that complements the rest of your home. - Consider the Functionality
Make sure the layout of the space is both practical and comfortable. Ensure you have enough room for all your fixtures and that there’s enough storage for towels, toiletries, and cleaning supplies. - Select Materials
Select durable and water-resistant materials for your bathroom renovation. Common choices include tiles, waterproof vinyl flooring, and moisture-resistant paint. Don’t forget to choose your vanity, sink, tapware, and shower screen. - Design for Natural Light
Natural light can make your bathroom feel more open and airy. Consider installing larger windows or adding a skylight if possible.
Step 4: Hire Professionals Or DIY?
Depending on the scope of your renovation and your skillset, you may need to hire professionals to help with the work. However, if your renovation is minor and you have some experience, you may opt for a DIY approach.
Hiring A Professional Vs. DIY
- Professional Help
For major renovations, it’s essential to hire qualified tradespeople, such as plumbers, electricians, and builders. They can handle the more complex aspects of the renovation, ensuring the work complies with local regulations. - DIY Renovation
If you’re confident in your abilities, you may choose to tackle some aspects of the renovation yourself. However, keep in mind that plumbing, electrical, and tiling work are best left to professionals.
When To Hire A Professional
- If your renovation involves moving plumbing or electrical systems.
- If you’re planning a full remodel that includes structural changes.
- If you need assistance with design and layout
Step 5: Obtain Necessary Permits
Before you begin the renovation, check whether you need permits or approvals from your local council or authority. Permits are typically required for structural changes or plumbing work, especially if you’re altering the layout or adding fixtures.
Steps For Securing Permits
- Consult Local Authorities
Visit your local council’s website or contact them directly to find out what permits are required for your renovation project. - Submit Your Plans
If required, submit your renovation plans and designs for approval. This may involve a consultation with a building inspector or a tradesperson. - Keep Documentation Handy
Once your permits are approved, make sure to keep copies of all documentation in case it’s needed during the renovation process.
Step 6: Order Materials And Fixtures
Once your design and permits are in place, it’s time to order your materials and fixtures. This includes tiles, paint, vanities, taps, lighting, mirrors, and other accessories. Make sure to order these items well in advance to avoid delays in the renovation process.
How To Order Materials
- Create a List
Make a comprehensive list of all the materials and fixtures you need, including the quantity of tiles, paint, and other products. - Consider Delivery Times
Be mindful of the delivery times for items, especially if they are custom-made or come from overseas. It’s a good idea to order items early so that everything arrives on time. - Choose Quality Products
Invest in quality materials that will last. This includes water-resistant flooring, high-quality taps, and durable vanity units. While it may cost a little more upfront, you’ll save on maintenance and replacements in the long run.
Step 7: Start The Renovation
With everything in place, it’s time to start your bathroom renovation. This stage involves the demolition of old fixtures and finishes, followed by the installation of new elements.
Step-By-Step Process
- Demolition
Remove the old tiles, fixtures, and fittings that are no longer needed. If you’re changing the layout, this is when you’ll move plumbing and electrical systems. - Install Plumbing and Electrical
Have a qualified plumber and electrician install the necessary plumbing and electrical work according to your new layout. - Tiling and Flooring
Lay down the new tiles or flooring. Make sure they are properly sealed to prevent water damage. - Install Fixtures and Fittings
Install your new vanity, mirror, taps, and other fixtures. Make sure everything is securely attached and working correctly.
Step 8: Final Touches
After the main work is completed, it’s time to add the finishing touches. This is where you can get creative and personalise your space to make it feel truly yours.
Final Touches Include:
- Paint: Apply a fresh coat of paint to the walls or ceiling to add a new layer of protection and aesthetics.
- Lighting: Install new lighting to brighten up the space, and consider ambient, task, and accent lighting.
- Storage: Add shelves, cabinets, or hooks to increase storage and reduce clutter.
- Accessories: Finish off your bathroom with stylish accessories, such as towels, plants, and soap dispensers.
Step 9: Final Inspection And Clean Up
Once the renovation is complete, conduct a final inspection to ensure everything is installed correctly and works as it should. After that, give the bathroom a thorough clean to remove any dust and debris.
Checklist For Final Inspection
- Test Fixtures
Test all the taps, showerheads, and drains to ensure they are functioning properly. - Check for Leaks
Inspect the plumbing and fixtures for any signs of leaks or water damage. - Clean Thoroughly
Clean every surface, including the floor, walls, and countertops, to remove any renovation dust.
Conclusion
Planning your bathroom renovation is an exciting yet detailed process. By setting a budget, defining the scope, planning your design, and hiring professionals where necessary, you can ensure a smooth and successful renovation. With careful planning and organisation, your new bathroom will not only be functional but also a stylish retreat that enhances the value of your home.
Frequently Asked Questions
How Long Does A Bathroom Renovation Take?
The timeline for a bathroom renovation can vary depending on the scope of the project. A simple cosmetic makeover may take one to two weeks, while a full renovation can take anywhere from four to six weeks. It’s essential to factor in time for delays, especially if you’re waiting on custom products or permits.
How Can I Save Money On My Bathroom Renovation?
You can save money on your bathroom renovation by opting for cost-effective materials like standard tiles instead of premium ones, and choosing simple fixtures that still provide great quality. Doing some of the work yourself, like painting or installing accessories, can also cut down on costs.
Should I Hire A Designer For My Bathroom Renovation?
Hiring a designer is a good option if you want professional advice on layout, style, and materials. A designer can help you optimise your space and ensure everything fits within your budget. However, if you’re confident in your design skills, you can save money by planning it yourself.
Check Your Domain Name for more details.